THESIS
BOSS BATTLE WITH ORGANIC DESTRUCTION AND DYNAMIC VFX
UNREAL ENGINE 5
BLENDER
HOUDINI
ZBRUSH
ADOBE SUBSTANCE PAINTER & DESIGNER
DISCLAMER: This is project is a work in progress, new features may be added and existing features will be polished
JUMP TO FEATURE
DYNAMIC VFX
EFFECTS THAT INTERACT WITH AND EFFECT CHARACTERS VISUALLY
ENEMY FOLLOWING PROCEDURAL SNAKES + ENEMY POISONING


Snake particles generated with GPU ribbons use the enemy location as a parameter and follow them based on a line force originating at the enemy feet which scales vertically when snakes collide with the target thus allowing an additional climbing and coiling motion on the enemy.

Snake heads are rendered as low poly mesh particles which generate location events and collision events.
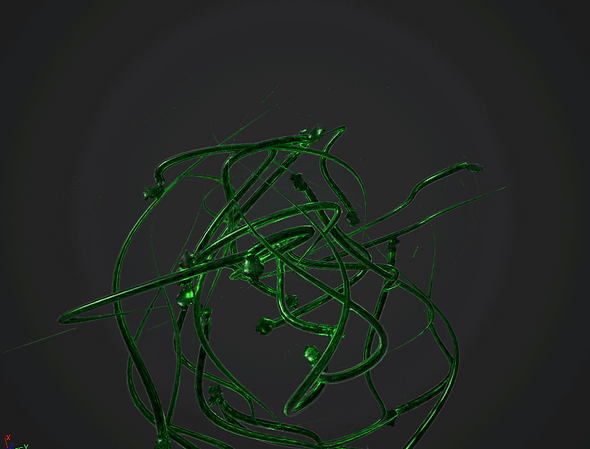
Snake Bodies are rendered as GPU Ribbons that use the Snake head location events as source, One tube Ribbon is generated per Head.

Toxic Fumes are rendered as GPU Particles using a simple smoke texture created using Photoshop and a sprite material. These sprites also use the Snake Head location events as source.
RANDOM ARC FOLLOWING FIREBALLS + ENEMY BURNING

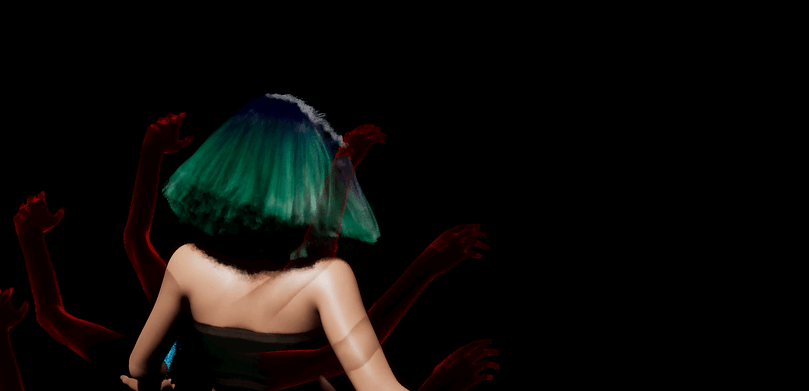
Fireballs are Blueprint based projectiles emitting Niagara particles. These fireballs are emitted randomly from the magic hands sockets and their various parameters such as Number, Speed, Arc Radius, Max/ Min Curve Variation can be tweaked by the user.
The Niagara particles use the same Particle Material as the Snake Head Toxin fumes and are tweaked to give a smoke and fire visual.
The trajectory of these particles are calculated using two vector based equations explained below:
#1

Mid-Point determines the center of origin of the arc.
It is calculated by getting the directional vector from the Player's location to the enemy location, multiplying it by a random float to add variation to the point then adding it to the Player's Location.
The Blueprint Implementation of the equation is given below:
#2

Curve-Points are multiple points drawn along the trajectory of the arc created around the Mid-Point.
It is calculated by first getting the Look At Rotation (This gives us a vector which tells us which XYZ directions a specified vector has to be rotated to point towards a target vector) of the Target projectile location from the previously calculated Mid-Point, we then get just the Y vector of the Look At rotation and multiply it by a random Curve Radius which determines how far the fireball will arc. We then rotate this point by a user determined random Angle, along the perpendicular X Vector. Doing so gives us a curving trajectory which can then be used to generate points which the projectile can follow.
The Blueprint Implementation of the equation is given below:
Finally when the projectile is instantiated the curved trajectory is calculated and the projectile is interpolated towards consecutive points drawn along the trajectory. A Niagara particle fire and smoke trail is also activated when the particle spawns and de-activated when it collides with the enemy character.

Finally when the enemy takes damage by the fireballs an additional skeletal mesh location Niagara emitter is attached to the Enemy mesh thus giving it a burning effect for a specified duration.
ICE ATTACK + ENEMY FREEZING


The ice attack happens in 3 stages:
#1 Attack Charge


The attack charges up in a spiral of wind while additional high velocity wind particles surround the central system.
The central system and high velocity wind is achieved by using a single texture created in photoshop used for the particle sprite.
The whirlwind system is created using a mesh renderer and applying a stretched and masked noise texture on the same. These mesh particles are then rotated and scaled down over time with some linearly randomized variance.
#2 Release Attack Energy


Immediately after the charge, the attack energy release FX is played. This is achieved by using a tiling caustic texture in a material which uses particle material parameters to pan and scale the textures inwards thus giving us control over texture speed and RGBA.
Similarly a second refractive particle material was created for a refractive effect.
The particle material is as given below:
#3 Freezing Mist

The freezing mist effect is spawned from a random socket location on the magic hands component. This effect comprises sub UV animated particle sprites that take the enemy location as a user parameter if the enemy is within a specified radius and are forced towards the enemy with a point force thus giving the effect a more varied motion.
SIMULATED BLOOD SPLATTER + ANIMATED DECALS
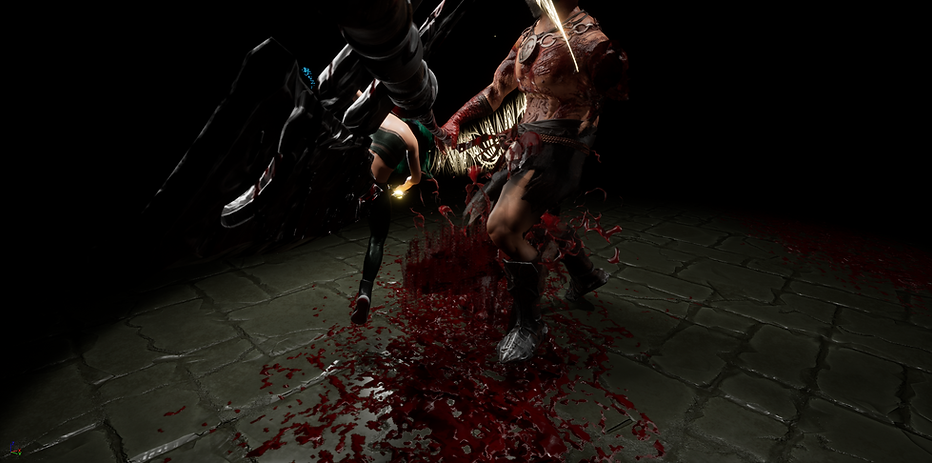

The Blood VFX was simulated in Houdini and composited onto a plane to generate flipbook textures to be used in Unreal Engine as a sub UV animated particle.

HOUDINI:
Objects

The objects for this simulation to bake process consisted of a spherical FLIP source, a FLIP DOP net, a fluid surface SOP, a baking setup for a plane and a compositing net to create flipbooks from rendered textures.
Source
For the simulation source object a sphere was created. This surface was given more variation using attribute noise.
DOP Net


The Blood Splatter uses a FLIP fluids solver to generate the particle fluid simulation.
Fluid Geometry
To create the geometry from the simulated particle data I used a particle fluid surface node. I also cast a mask by feature to the generated surface in order to generate occlusion quickly. Then, I cached the resulting geometry and added vertex color and a principled shader to give it various physical rendering values.

Baking Setup

I used an object merge to group the attributes of the generated fluid geometry then computed its normal. The next step was copying the occlusion data generated by the mask by feature to the AO attribute of the geometry.
I then deleted the occlusion attribute as we no longer need it in the output renders.
I created a plane with a flat UV map and then baked the Normals, AO and Vertex Color.
Compositing Setup
For compositing I first setup file nodes for each rendered attribute, these renders were then renamed and grouped in order to be tiled as 6x6 sprite textures using a mosaic node. These textures were then scaled to a 2K resolution and assigned to the RGBA channels of a singular texture.

UNREAL ENGINE:
The same flipbook texture was used in 2 Ways:
Particles and Decals
For the particles I used the flipbook to make a sprite material and used subUV animation to play the animated flipbook on a single sprite. This sprite has random rotational and non-uniform scale variation every time it spawns thus reducing repetition.
For the decals I exposed the animation phase of the flipbook thus allowing the flipbook to be animated through blueprints when spawned. This also allows us to play the animation only once and stop at random phases to give more splatter variation. These decals were then spawned in tandem with the Niagara particles giving a combined visual feedback of Attack Splatter and Ground Splatter.


ADVANCED MATERIALS
TRIGGER WARNING: LOTS OF EYEBALLS

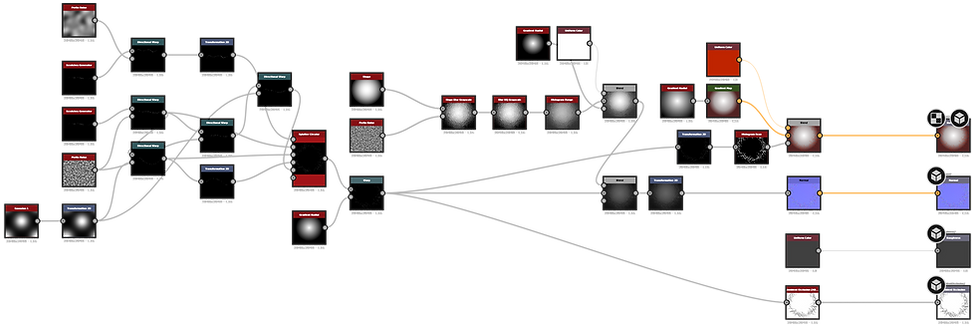
This eye material is based on Snell's Lens Law Approximation Equation for Real-Time rendering applications. All refractive properties and depth of the eye are calculated from the camera vector and used in the Diffuse. This allows for a cheap non refractive material while giving us UV offset controls of the following:
Iris Depth


Iris Diameter

Index of Refraction

Pupil Size

Edge Sharpness
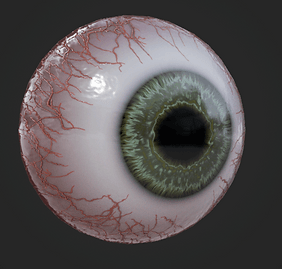
Iris Texture

This equation is used to calculate the refractive depth of the Iris, we use the Camera Vector WS as the incident ray and Pixel Normal WS as the surface normal for Snell's law to get a "refracted" vector which offsets the normals for the iris region of the eye thus giving us the illusion of depth.
Blueprint Implementation:

Additional masking and UV offset transforms were parameterized for the material to make it more dynamic and customizable. All of these operations are also performed on the albedo only thus keeping the shader complexity optimized.
The Iris and Sclera textures were also made non-destructively in Substance Designer. This gives us control over the Fiber and Vein Counts, Color Variations, Fiber Shapes and Normal Intensities.



SINGLE MATERIAL PHYSIOLOGICAL DAMAGES
Each VFX attack damages the character visually through different texture sets. These are combined into a single material which grows organically over the character over a specified duration.

Blend Value 0.5


Blend Value 1
To achieve this, first 3 different damage type texture sets are created by hand using Substance Painter, these textures are then used by a single material from a shared sampler source thus allowing for an optimized instancing of textures through the GPU.
We first use switches to decide which Texture Set will be used in case of the specific attack and then the set is Blended To and From the main undamaged texture set using World Aligned Blend.
Both the Switch Value and Blend Values are controlled using Global Material Parameter Collections thus preventing creation of Dynamically Instanced Materials for each damage type.


REALISTIC CHARACTERS
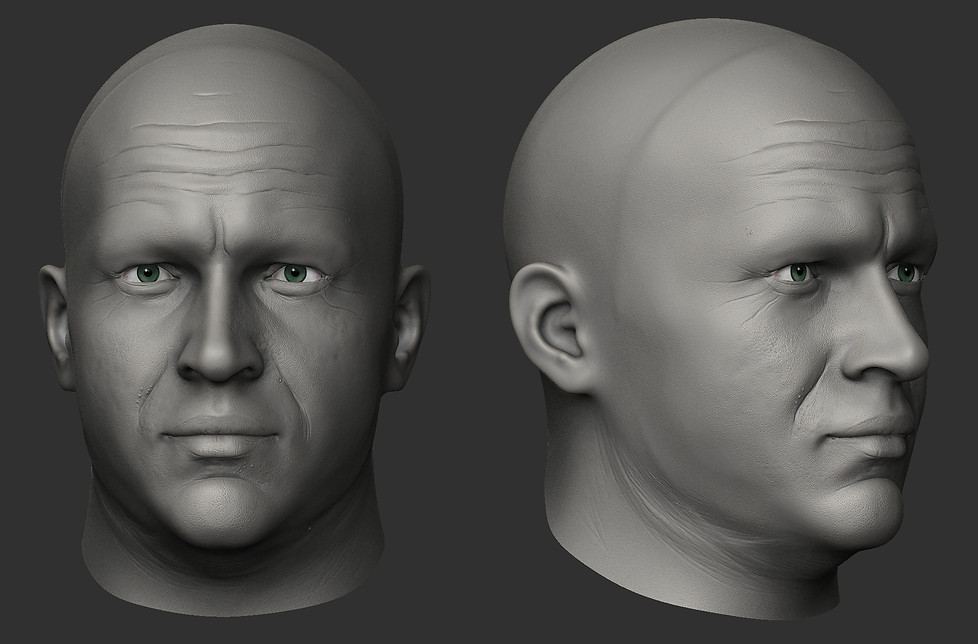
GAME READY REALISTIC CHARACTERS BASED ON THE LIKENESS OF TOM HARDY & ANYA CHALOTRA

TRIGGER WARNING: INTERNAL HUMAN ANATOMY (GUTS & STUFF)


GIB DESTRUCTION SYSTEM
The gib destruction system created for this project allows for swapping out different skeletal mesh parts existing on the same skeleton in real-time.


For each destroyable intact part, e.g. the Arm, there's a corresponding destroyed part that can be swapped out based on any desirable parameters such as damage or hit-count.
When a part is destroyed, it is simulated with force thus giving the illusion of being cut-off with force.
Additional properties such as soft-bodies or cloth simulation can be added to the destroyed part to give it a more natural fleshy effect. Here I used a cloth-sim on the destroyed arm mesh to represent hanging tissue.
The leader pose component in Unreal Engine allows for combining multiple skeletal meshes if said meshes are using the skeleton or rig-hierarchy. This gives us the ability to animate multiple skeletal mesh parts together seamlessly (Given the corresponding parts are skinned together first and then separated).


RIGGING & ANIMATION ENGINEERING
Because of the nature of the destruction system, the enemy character for this project was first skinned as a whole and then separated into pieces based on the nature of destruction.


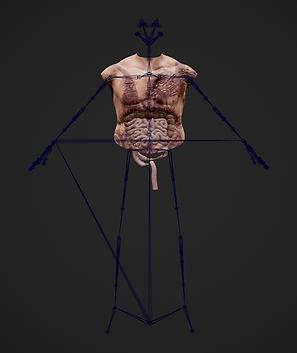
Additionally custom physics assets were made for the various props for the waistbelt of the character as well as cloth simulation painting was done for the various fabrics and destroyed flesh tissue.


For the player character I wanted to go for a floating style locomotion which feels smooth and doesn't snap on rotation, to achieve this I created an idle floating animation in Blender, then made additional directional animations using a Control Rig inside Unreal Engine. I baked these animations to sequences and used them inside a 2 Dimensional Speed VS Direction Blendspace.

Additionally I made floating Dodge and Attack animations in Blender, These animations and animation sets have the following features:
Equip and Unequip State Locomotion
Directional Dodge
Quick Animation Cancelling
Triple Attack Combos
To achieve these different states I made modifications to the Mannequin an Animation Blueprint, by using cached posed slots for the Upper Body bone group I could reuse the lower body floating locomotion while using both Equip and Unequip Animations. This allowed for a more modular approach to combining and slotting animations.
Additionally this system also allows me to use different kinds of animation sets for different weapons and quickly iterate it on the same character blueprint.
This is achieved by creating cached posed states for different animation sets which entails creating different locomotion blend spaces for different kinds of weapons. For this project I only had one kind of weapon and animation set.


For the Attack Combo system I created an Animation Notify event which communicates with a state manager and saves or unloads attacks based on the duration between them. This Notify can be added at any point in the Animation Sequencer where the combat designer wants to achieve the combo to continue from in the event of consecutive inputs.

AI BEHAVIOR TREES
For this project I made my own Boss AI tailored to the scope of this project. The following behavior trees showcase the following behaviors:
Patrolling
Enter Combat
Exit Combat
Chase Player
Ranged Attack
Chanced Melee Attacks


